|
Fieseler 156 Storch build log (page 2) |
||||||||
|
|
go to.....
HOME
|
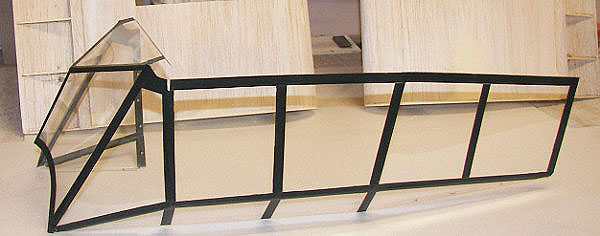
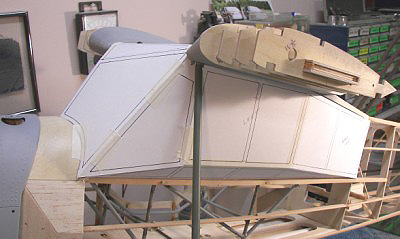 The greenhouse canopy is nightmare of flat glass panels..... a real challenge as to exactly how to build it. After a lot of thought I decided to first make a paper template of the |
||||||
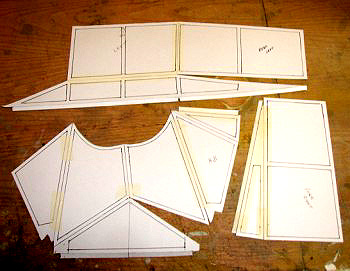
| entire greenhouse (see above) the paper facets are held together with tape. After removing the paper templates I laid them out flat on the table and separated the joints so that I ended up with three individual templates. From these templates I will trace the outline and panel join lines onto a sheet of .030" PETG plastic and cut them out as accurately as I can. | ||||||||
 |
|
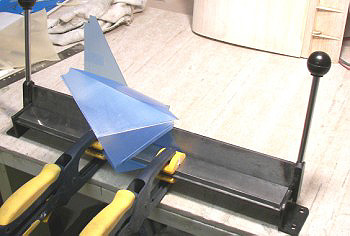
The PETG can easily be bent and will hold the bends indefinitely just like sheet metal. Other types of plastic won't do this. I will do the bending with a small sheet metal bending machine. The finished window panels will therefore be mostly all one piece with only a few joints. | ||||||
 |
 |
|||||||
|
Here the plastic is
being bent on a little 18" sheet metal break. This machine gives nice
clean bends. The blue protective film keeps scratches away. |
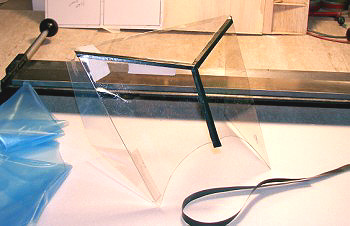
After the blue film s peeled off the joints are taped together with pre-painted Super Coverite cut into strips.....eventually all of the canopy will be outlined with the tape. | |||||||
|
|
||||||||
|
|
||||||||
|
|
 |
|||||||
|
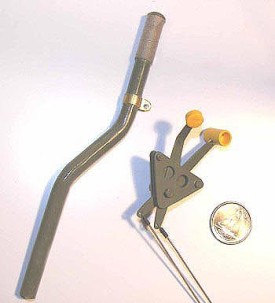
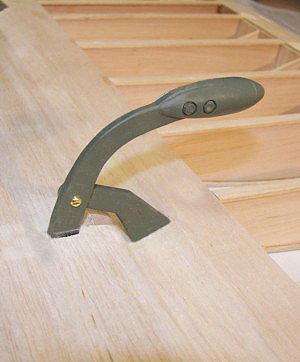
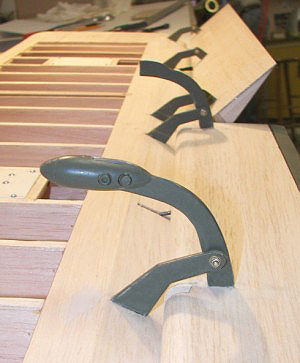
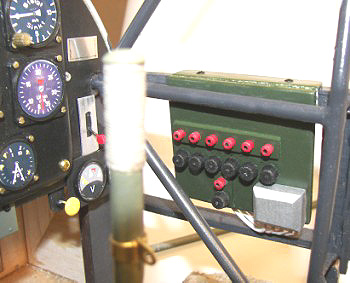
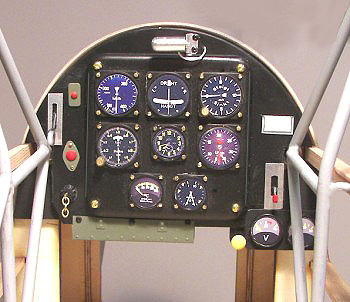
Here are some more small
detail.....Joystick, throttle and dash are completed, the instrument faces were downloaded on my
computer and printed on glossy paper. The plastic bezels are from Germany.
The rest of the small detail is bits of junk from around the shop. |
||||||||
|
|
||||||||
|
|
|
|||||||
|
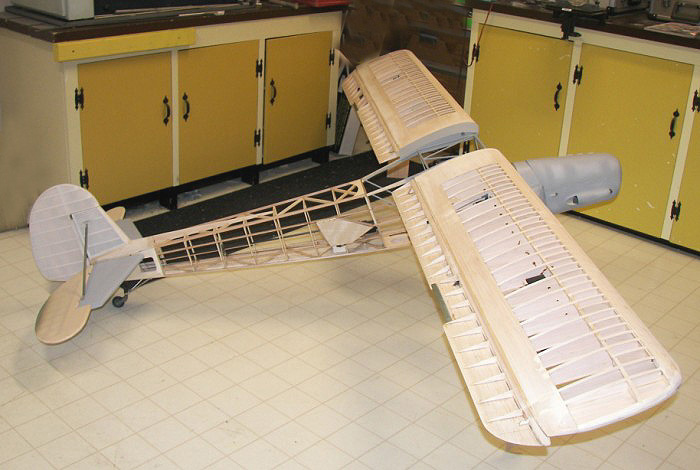
November 10th.
At this date the wings are built
and ailerons and flaps installed. The counterweights on the ailerons are
carbon laminate. 2-48 brass bolts with aluminum elastic lock-nuts form the
hinge pins. There is a nylon bearings in each of the joints. All six
hinges on each side had to be aligned carefully to avoid binding. ..... to do
this I ran a piece of carbon rod through all six hinge pin holes on each
side. The hinges work well. The ailerons have 20 degrees up and ten
degrees down which I think will be correct for this airplane. |
||||||||
|
|
||||||||
 |
 |
|||||||
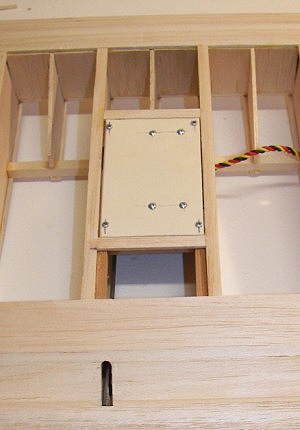
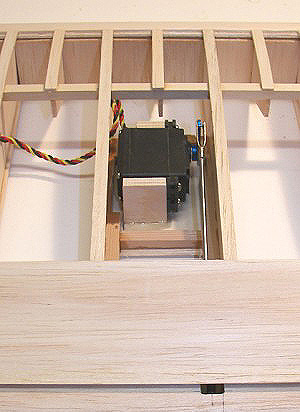
| The servos are installed in my pet fashion.....the servo is mounted on the back of the servo door so that the servo comes out when the door is removed. I'm using Hitec 5645MG servos, they have plenty of torque even with a considerable power loss from the long wire leads to the receiver. Flap and aileron servos are mounted the same way. | ||||||||
|
|
||||||||
 |
||||||||
|
This thing is all wing!! I can't wait to see it jump off the ground!! Normally the
flaps will have about 30 degrees of down however I am told that
the Storch has a
droop-aileron feature. As the flaps come down past the 30 degree take-off
position, the ailerons come down and function as landing flaps. In the
full-down position, the flaps are roughly 60 degrees down and the neutral
ailerons are 20 degrees down..... Wow!! that's a lot of
drag, no wonder they land so slow!! I can do this mixing with my Stylus. |
||||||||
|
|
|
|||||||
|
|
||||||||
 |
|
|||||||
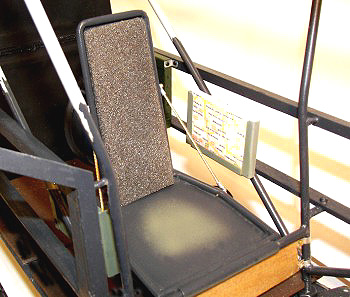
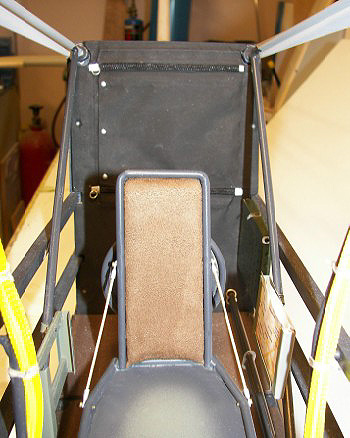
| All the interior detail now needs to be finished in before I can start the covering. Here you can see the dash, joystick, rear seat and the rear bulkhead completed. The fuse panel is made of balsa and bits of styrene. The map holders on each side of the seat are sheet aluminum. The rear bulkhead is Super Coverite over a sheet of depron. | ||||||||
|
On the fullsize storch access to
the rear compartment was through this canvas flap on the rear bulkhead.
There are two zippers and button snaps sewn into the fabric.
|
|
|||||||
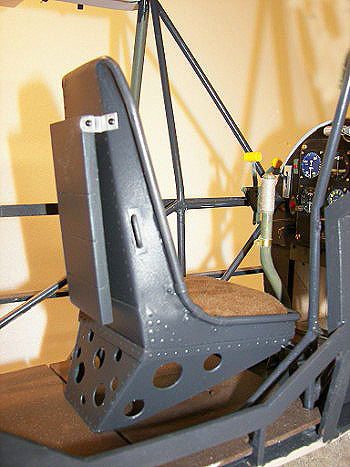 |
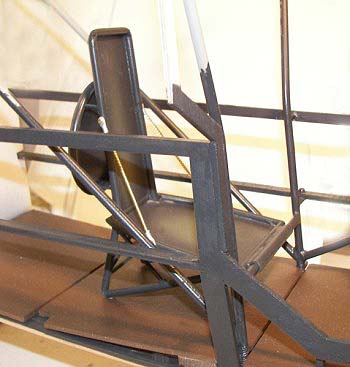
And here's the front
seat.....also made of tube and sheet ABS. The cushions are foam with a suede covering on them. There is a a folding map table hung on the back of the seat. Interior color is RLM 66. I'm using "Warbird Colors" acrylic paints throughout. The front seat weighs a little over an ounce!! |
|||||||
|
|
||||||||
|
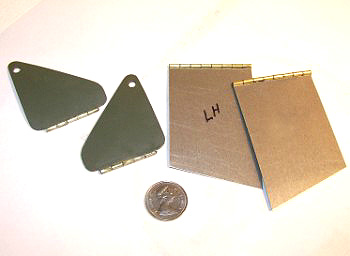
More small
parts.....these made of thin aluminum sheet, they will be hinging doors
and panels on the wings and fuse.....primed with Duplicolor self-etching primer |
 |
|||||||
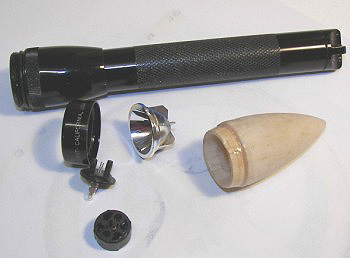 |
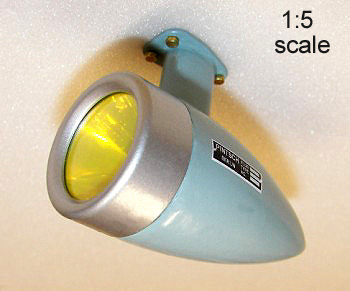
To make the landing light I had to buy a little aluminum flashlight, trash most of it and keep the lens, reflector and the front ring for my landing light.....I turned the balsa teardrop shape on my lathe. It will mount under the wing and be activated with a microswitch when the flaps are applied. | |||||||
 |
|
|||||||
|
November 28th...... |
||||||||
 |
 |
|||||||
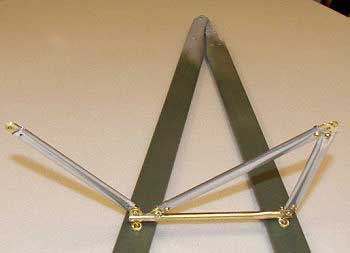 |
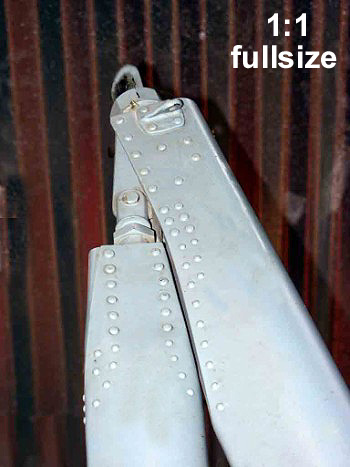
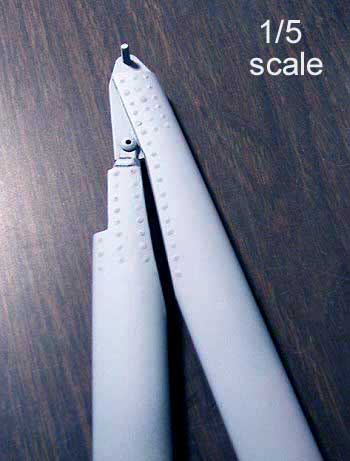
With the wings trial
fitted it is time to finish the struts.
The fuselage is set into a jig and the wings leveled. The strut length is carefully measured and the struts cut to length. The wing struts are streamline aluminum tubing from Sea Commander .....the float people ..... expensive but good and strong. They are .035" thick. The half struts are streamline aluminum tubing as well with small brass inserts on each end and 2/48 brass bolts. |
|||||||
|
|
||||||||
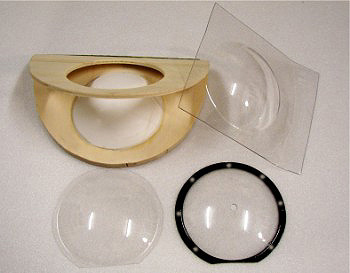 |
The blister for the
machine gun had to be made of clear plastic. it will fit into the rear of
the canopy and serve as a mount for the MG15 machine gun.
I pressed-formed the blister with a "poor-man's vacum former"......the plastic is heated with a heatgun and is simply pressed over the plaster mould in the hinged former. |
|||||||
|
|
||||||||
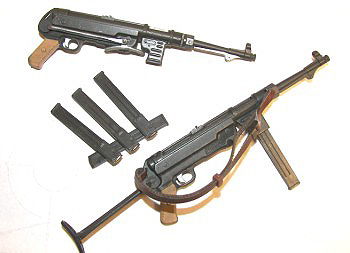
| These two German MP40 machine pistols arrived today from Legends Toys & Hobbies. They will go in the rear cockpit.....they are inexpensive and very detailed. The magazines are removable and the bolt actually works. |
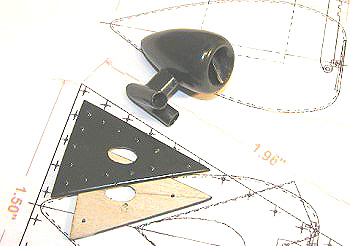
This is the fresh air
scoop that will go on the top of the canopy. The body of the scoop was
turned from balsa on my lathe. the air ducts are brass tubing and the
mounting plates are plywood. Sizes were all scaled up from original German
drawings. |
|||||||
| < Back to Page #1 Go to Page 3 > | ||||||||
|
|
||||||||